Support Center.
Get Started or Become a Pro. Browse our support articles to learn how to get the best out of PeopleGoal.
Workspaces for Pros
Workspaces are the containers for all of your apps. Think of a workspace as a category within your account - like Performance Management, Onboarding and Talent Development. They make your PeopleGoal account easy to navigate for users, and easy to manage for owners. Workspaces have their own permission settings which allows you to control who can see, create and edit all of the data contained in the workspace.
Before you dive in make sure you've read the Workspaces article in the Getting Started guide so that you've got the fundamentals down - how to install a workspace template, how to navigate the workspace and what the workspace settings are.
In this article we'll show you how to create a new workspace from scratch, how to set your workspace permissions and how to set up app folders in the workspace.
Create a New Workspace
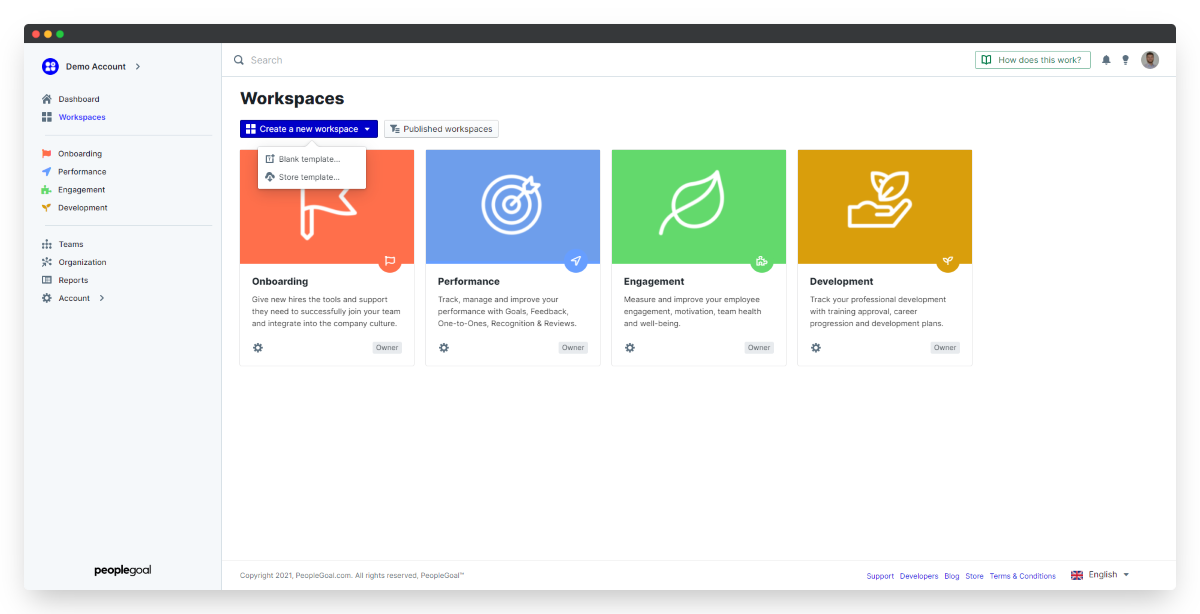
- Click on the Workspaces icon in the navbar.
- Click Create a new workspace and select Blank template.
- Give your workspace a catchy name and a description. These will be visible to everyone in the account regardless of their access permissions.
- You'll see a banner saying "This workspace is in draft mode". This means it's only visible to you, the workspace owner, until you're ready to publish it. Publishing means making the workspace visible to everyone else. You can publish your workspace now or come back to the Settings to publish it later.

Next you're going to set up the basic workspace settings.
- Click your Settings tab to get started.
- Click Expand in the far right of each settings section to make your changes.
- Click Save changes to lock in your updates, or Cancel changes if you don't want to save any updates.

Details
Change the workspace name and description (great for checking if you made any typos when you created your new workspace).
Image
This is the workspace cover image.
- Click the default image to update this.
- Select Upload image to upload your own image file or click Search for an image to browse the stock photography library.
- The workspace image is cropped 3:4 in the overall workspaces area, and circular cropped in the individual workspace view, so make sure to choose an image that works for both.
Style
Select the workspace color and display icon. By default these will be the same for any new apps you create within the workspace.
Status
You're already working in draft mode. When you're ready to publish your workspace, either toggle the "Draft" button to "Published" and save your changes, or click Publish workspace in the yellow banner above.
Configure Workspace Permissions
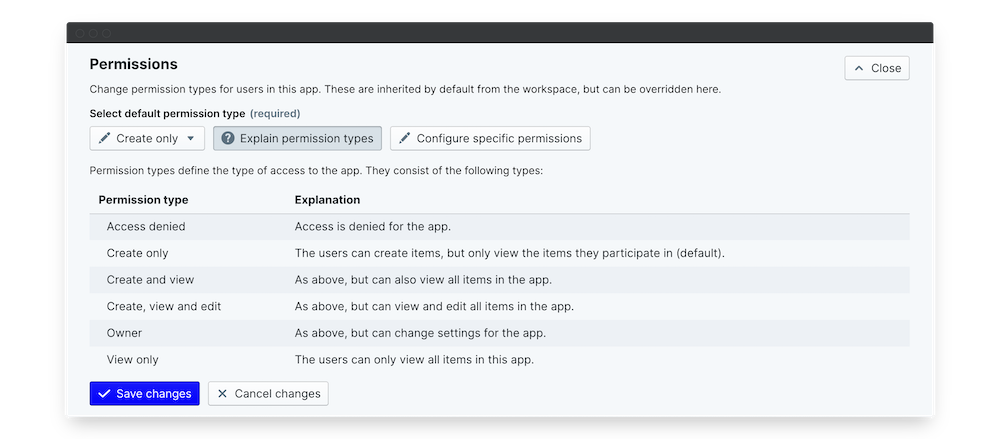
The default permisssion type is listed in the drop-down button (generally this will be "Create only"). This is the access level that applies to everyone in your PeopleGoal account.
- Click Configure specific permissions to set up other access rights by exception. Access can be given to teams (groups of users) or to specific users.

As an example, you might create a Performance Management workspace that will contain a suite of performance management apps for goal-setting, one to ones and performance reviews.
The default permission type will be "Create only", so that all employees on your PeopleGoal account can create their own OKRs and complete performance reviews, but they can't view the OKRs or reviews belonging to their colleagues.
You can then configure specific permissions to make your Human Resources team additional workspace owners. Everyone in this team would have workspace owner rights, just like you do.
You could also configure a specific permission for your CEO to give them "Create and view" access. They'd be able to create their own items and view items for all other employees - without having owner rights to change workspace settings.
Remember to hit Save changes to lock in your updates.
Head over to our Permissions & Visibility article to understand permissions in detail.
Set up App Folders
Once you've got your settings and permisssions configured, click on the Apps tab to add workflow apps to this workspace. Either install an app from our App Store or create your own custom app.
Once you have a few apps added to the workspace you've got an extra way to organize your apps - called Folders. Using folders adds a menu list to the lefthand side of your workspace, and allows you to group common apps together. This is especially useful when you've got five or more apps within a workspace.
Create the folder view
- Select Use folders to start creating your folders.
- You'll start with two default folders called Home and Uncategorized.
- Click the pencil icon next to the Folders title to rename your "Home" folder. Click on the "Home" title to edit.
- Click Add folder to create and name more folders.
- Click the pencil icon again when you're done.

Add apps to folders
- Click the Uncategorized folder to start sorting your apps.
- Click the cog icon in the bottom left of an app, then select Move to folder.
- Choose which folder to send this app to, and repeat for all the other uncategorized apps.
- Now to access your groups of apps, just click the Folder title and your categorized apps will appear.
Change an app's folder
- Open up the current folder the app is in.
- Then click the cog icon in the bottom left of the app and select Move to folder.
Remove App Folders
- If you want to switch back to the regular workspace view, click the pencil icon next to the Folders title to edit.
- Click the red "x" next to each folder name, and all apps within that folder will become uncategorized again.
- Select Delete folder to confirm.
- Keep deleting all of your folders until you're back to the default workspace view.
Now that your workspace is ready to go, let's go into detail about creating and editing apps.
PeopleGoal Support Team
Account Management & Implementation Specialists